Understanding Gas Cooktop Installation Requirements
Understanding the prerequisites before installing a new gas cooktop is essential. Gas cooktops come in different types with specific installation needs. Having the right tools, materials, and meeting electrical and gas requirements in advance ensures a seamless installation.
Ensure a 120-volt, 15-amp grounded electrical outlet is nearby to power the cooktop’s ignition system.
Confirm the cooktop’s dimensions to ensure it fits the countertop cutout, considering space required between the cooktop and adjacent surfaces.
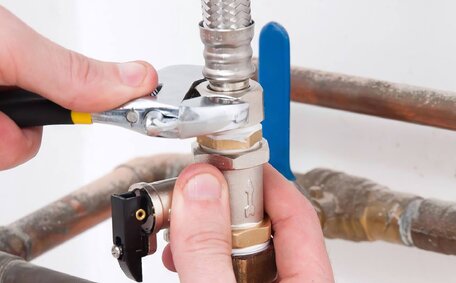
Consult local building codes and obtain the required permits for professional installation and connection of gas lines. It is highly recommended to use a licensed gas fitter for securing end fitting components in gas connections, including the line shutoff valve. A licensed gas fitter can ensure correct gas fitting line sizing, secure pipe joint connections, apply sealants, and conduct leak tests to ensure safety.
Preparing the Countertop and Surrounding Area
Before setting up your gas stove, thoroughly clean the countertop and surrounding area.
Clear any debris, grease or use this opportunity to discard the caulk since you’re replacing an old gas cooktop. Begin replacing units and take out the old one if still in place. This ensures you have ample workspace for removing your old cooktop and accessing the end connector fitting.
Verify the new cooktop’s dimensions to ensure it fits perfectly into the existing countertop cutout. For a right angle pipe cut in an enlarged cutout, use a jigsaw to precisely cut through countertop materials.
Account for the necessary clearance to ensure the new cooktop going in fits between the cooktop edge and walls or overhead cabinets. Gas cooktops require up to 30 – 36 inches clearance to avoid heat triggering the up gas process.
Assessing Gas and Electrical Line Requirements
Ensuring that your gas electrical lines and other connections can accommodate a new gas cooktop is crucial. Check that a gas pipe, measuring approximately half an inch in diameter with a gas cock, is within 1 metre of the installation point.
Examine the gas port and the gas hose feeding your cooktop cutout to ensure the gas supply can meet the required BTUs for your model.
Typically, this is provided by a power point inside a cabinet or housed within a junction box underneath. Utilise a voltage tester to safely turn off power and check that the fuse box and outlet operate correctly. Upgrading electrical lines or outlets may be needed to meet manufacturers’ requirements.
Get a local gas company technician to assess your gas pipe dimensions and water heater electrical requirements prior to purchase. They can verify pipe size, use teflon tape, apply pipe sealant, utilise a leak detector, test pressure, and ensure your setup adheres to codes set by the local gas company for safe functioning.
Choosing the Ideal Cooktop Size and Installation Style
When selecting a new gas range, the ideal size and installation style depends on your kitchen layout and countertop dimensions. Typical widths are 30, 36 or 48 inches. Measure the width and depth, as dimensions can vary depending on the model, to ensure the new cooktop will fit existing countertop cutouts.
The main options for your gas ranges, including wok burner models, are slide-in or drop-in cooktops. Drop-in models have edges that rest on the countertop surface.
Slide-in ranges have finished cabinet sides and can fit snugly with solid surfacing between base cabinets. This style aligns perfectly with modern designs, enhancing the aesthetic of your new kitchen with solid surface counters.
Ensure a secure seal and prevent potential fire hazards by always using yellow Teflon tape, as specified by the manufacturer. Checking sharp edges and proper gas sealing is also vital to guarantee safe functioning.
Planning for Adequate Clearances and Safety
Ensuring proper clearances is imperative when installing cooktop to prevent fire hazards. A minimum vertical clearance of 600 mm from combustible surfaces above and a 200 mm horizontal clearance on each side of the cooktop are generally recommended.
Measure accurately from the edges of your cooktop to walls, cabinets, and other appliances to ensure there’s enough space. Consult your manufacturer’s manual for specific clearance requirements. Insufficient clearance poses serious safety risks, particularly concerning cooktop gas ventilation.
Ensure unobstructed access for slide-in ranges, as they require an open space to fit snugly between cabinets. Account for necessary room to manoeuvre, secure attachments and gas or electrical connections in the back or underneath.
Making the Countertop Cutout
Measure and mark the countertop cutout area following the manufacturer’s specifications when installing a gas cooktop. Typical cutout dimensions are about 28 1⁄2 inches wide by 19 1⁄4 inches deep, notably smaller than a 30 x 34in cooktop.
Acquire the appropriate tools, such as a jigsaw or oscillating tool with the right blade, to cut through countertop materials and accurately outline the space.
Create rounded interior corners to fully utilise the space and ensure the cooktop fits perfectly. Smooth any rough edges. Ensure your new cooktop can achieve an exact fit by test fitting it into the cutout.
The opening should be flush with the front edge of the countertop. Seal the edges with caulk to protect against spills and leaks.
Consider hiring professional assistance to ensure extreme precision when modifying the countertop for proper clearance, stability, and a secure gas connection. An imprecise cutout increases risks of gas leaks, electrical shorts or cooktop breakage.
Securing the Cooktop and Finalizing the Installation
Secure new fixtures firmly and position the gas cooktop accurately within the cutout. Most models include mounting brackets, screws and clamps to attach the cooktop underneath the countertop. Follow manufacturer instructions to properly install these fittings, ensuring all fittings need are inclusive, including the off gas cock if applicable.
Tighten the connector’s gas fitting screws to stabilise the cooktop, being careful not to overtighten.
Fire up the gas shut off and power supply to test your new appliance ignition and functionality.
Carefully take cooktop into final position and can install your new gas cooktop centred with the cutout front edge. Confirm a uniform gap between the sides and surrounding countertop of about 1/8 inch, using adhesive tape if necessary. Use silicone caulk to seal the edges neatly, which makes it easier to clean up spills and prevent debris buildup.
Thoroughly Testing for Gas Leaks and Safety Compliance
Check your gas connections for leaks by brushing on a soapy water solution with a paintbrush. After installing your new gas oven, a thorough safety inspection, including the application of pipejoint compound, is crucial before use.
Also sniff near floor level for gas odours, and remember to check back your gas connections as some leaks may be harder to see. Confirm the cooktop is properly secured, aligned with the countertop front, and has the recommended clearance on all sides. Review that electrical connections are grounded and enclosed per codes.
Refer to your local gas authority for instructions on safe stove installation and operation. Local gas fitter regulations may require new cooktop installations be inspected by licenced technicians. They can properly pressure test gas lines, verify no leaks exist, and guarantee your appliance meets strict safety standards.
Never ignite a newly installed cookbook without checking for old gas and thoroughly testing for leaks first. Learn how install gas stoves safely and prevent serious explosion and poisoning dangers posed by an undetected gas leak. Contact professional assistance to ensure your new cooktop is safely installed and functions optimally.
Tips for Switching between Electric and Gas Cooktops
When switching from an electric stove to a gas cooker, assess if existing connections are compatible with the new fuel type. Upgrading from electric to natural gas may require installing a new one with gas lines, valves, and vents. Similarly, switching from a gas to a gas electric appliance could require upgrading electrical circuits and outlets.
Enlisting professional help is highly advisable to evaluate if your flexible gas pipes, connectors, and valves are adequately sized and in good condition to connect gas to your new cooktop or possibly your electric cooktop. They can also assess if electrical lines provide ample power for an electric induction cooktop or if new wiring is needed.
If enlarging your countertop cut out for your cooktop upgrade, you’ve got to precisely measure the new gas stove’s cutout dimensions. Carefully cut the opening for an exact fit, allowing slight perimeter spacing for stability. Confirm your new cooktop model will have the minimum clearance to combustibles to prevent fire hazards.
When unsure about the tools and processes for installing gas or electrical connections, you’ll need the expertise of a licensed gas fitter. They can safely handle gas line installations, verify leak-free fittings, perform pressure testing, and guarantee full compliance with codes. This ensures your new cooktop functions reliably for years to come.
With some advanced planning regarding electrical and fuel line requirements, You can set up smoothly transition from your existing cooktop to a new type yourself. But we always advise connecting with a qualified technician for assistance when switching fuel sources to guarantee personal safety and proper appliance functionality.


